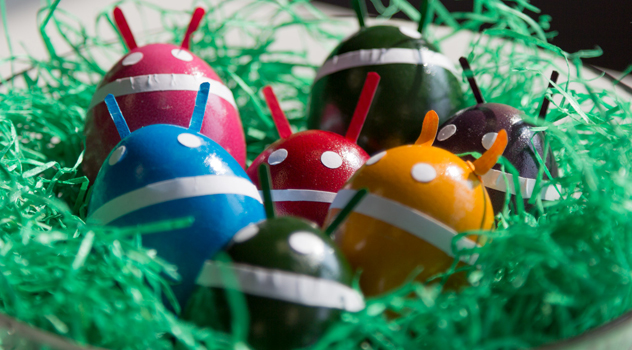
You think dyeing eggs is boring and for children and grandmothers only? You’re definitely wrong! Let me convince you of the contrary: There are far more possibilities rather than dyeing single-colored eggs. Our mysms team had great fun creating geeky Android eggs today 😀
Would you also like to have such remarkable geeky eggs? Here’s how to do it!
Before you start make sure you have the right materials at hand:
- Raw eggs and egg dyes or pre-dyed eggs (from the supermarkets or your grandma)
- White self-adhesive labels
- Colored paper or white paper and colorful pens
- Double faced adhesive tape or glue
- Scissors
- Some time and patience
1. In case you have much time left, you can buy blank eggs and dye them with egg dyes. Rather than making it on your own, you’ve also got the choice to buy pre-dyed eggs. It’s not as cool as making it yourself, but timesaving and more convenient. 😉 Basically, the color of Androids is green, but we didn’t want to give the colorful Easter eggs a miss, that’s why we decided to go for these ones.
2. The eggs are ready, so now you need to prepare the additional material for the eyes, ears and body of the Android. Cut thin stripes and dots from the self-adhesive labels for the separation of head and body and for the eyes. Additionally, cut out and prepare the ears by using the colored paper or the white paper which you paint with colorful pens.
3. You’re nearly at the end: Glue the ears and stick the separation stripe and the eyes on the egg. Afterwards, put the eggs in a smooth nest and you are finished with your DIY geek Easter project!
Have fun trying to make your own Android eggs – Would be nice, if you send us some pics! Happy Easter everyone 🙂


